
Alert Management
This page explains how to configure alerts from the Safecube platform.
Overview
Safecube's Alert Priority Management feature gives you complete control over how shipment events are categorized, displayed, and delivered. By assigning priority levels to different alert types, you ensure your team focuses on the most critical shipment changes while staying informed about routine updates.
This feature is available to all Safecube platform users across Free and paid tiers.
Key Concepts
Alert Priority Levels
Safecube supports three priority levels:
🔴 Critical: Events requiring immediate attention (e.g., significant delays, operational splits) 🟠 Warning: Events that may impact planning but aren't urgent (e.g., minor schedule changes) 🔵 Information: Routine updates for visibility purposes (e.g., port changes, minor route updates)
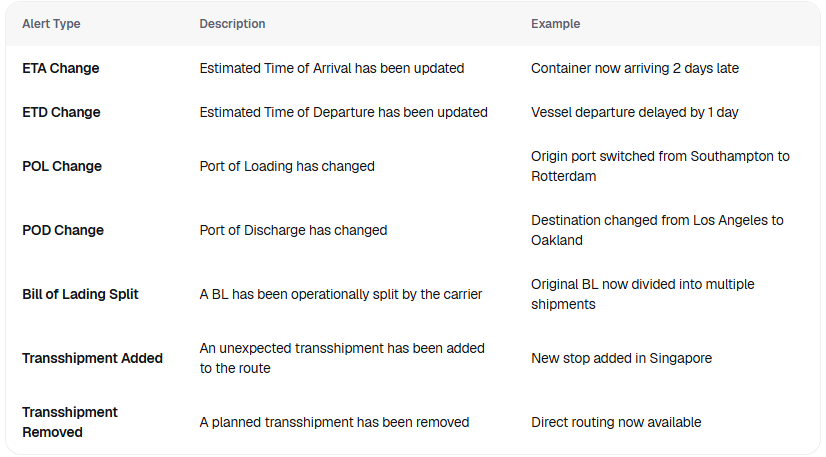
Alert Types
You can configure priorities for the following shipment events:
How to Configure Alert Priorities
Step 1: Access Alert Settings
- Log in to your Safecube workspace
- Navigate to Settings (gear icon in the left sidebar)
- Select Alerts from the Workspace Settings menu
- Click on the Configurations tab
Step 2: Set Priority Levels
For each alert type:
- Toggle the alert ON/OFF using the switch on the right to activate or deactivate email notifications
- The alert automatically appears under one of three priority sections: Critical, Warning, or Information
- Drag and drop alerts between priority sections to change their classification
- Reorder alerts within sections to define their display priority
Step 3: Save Your Settings
Click Save Settings in the top right. Your configuration will apply immediately to all workspace users.